A no-nonsense guide to starting with the right Tray and Canopy

G’day, mate.
We’ve all been there. You’re halfway through a massive trip, maybe somewhere in the Kimberley, and you pull up to the most perfect campsite you’ve ever seen. But before you can crack a cold one, you have to spend the next twenty minutes pulling half your gear out onto the dirt just to find the bloody camp stove.
This is all about sharing a few things I’ve learned over the years—some hard-won lessons from the tracks. We’ll go step-by-step through turning a standard ute into a reliable adventure partner. We’ll start with the most important foundations—the Ute Tray and Canopy—and move onto the ‘brains’ of the operation, like 12V power and storage systems. Most importantly, we’ll help you figure out what’s a genuine, must-have investment for safety and function, versus what’s a ‘nice-to-have’ upgrade (like drawers or a spare wheel carrier) that seriously boosts the quality of your trip. It’s all about making sure you’re spending your hard-earned cash in the right places.
The Hard Truth: Why Your Stock Ute Tub Isn’t Up for a Real Aussie Adventure
Before you can build the solution, you’ve got to understand the problem. A brand-new ute straight from the dealership looks great, but take it on one serious trip and you’ll quickly find its limits.
- Security is a Joke: That flimsy tailgate lock on a stock tub is barely a deterrent. Leaving thousands of dollars of camping and recovery gear in the back while you pop into a country town pub for a meal can be a nerve-wracking experience.
- Organised Chaos (at best): A tub is just a big bucket. Everything gets thrown in together, turning into a complete dog’s breakfast after five minutes on a corrugated road. Finding what you need is a frustrating, time-wasting exercise.
- The Elements Always Win: That fine, red bulldust? It gets in everywhere. A sudden tropical downpour during the wet season? You’ll be drying out your sleeping bags for days. A standard tub and a soft tonneau cover just can’t offer the protection your valuable gear deserves.
Getting it Sorted: A Step-by-Step Guide from an Old Hand
Building a great rig isn’t black magic; it’s just a logical process. You build the foundation, then you build the house on top. Here’s how I see it.
Step 1: Laying the Foundation – The Aluminium Ute Tray
The Consensus Among Old Hands: The first thing you’ll see any seasoned adventurer do is ditch the factory tub. The reason is simple: you get a completely flat, square, and stronger platform to build on. It’s the perfect blank canvas for every other modification.
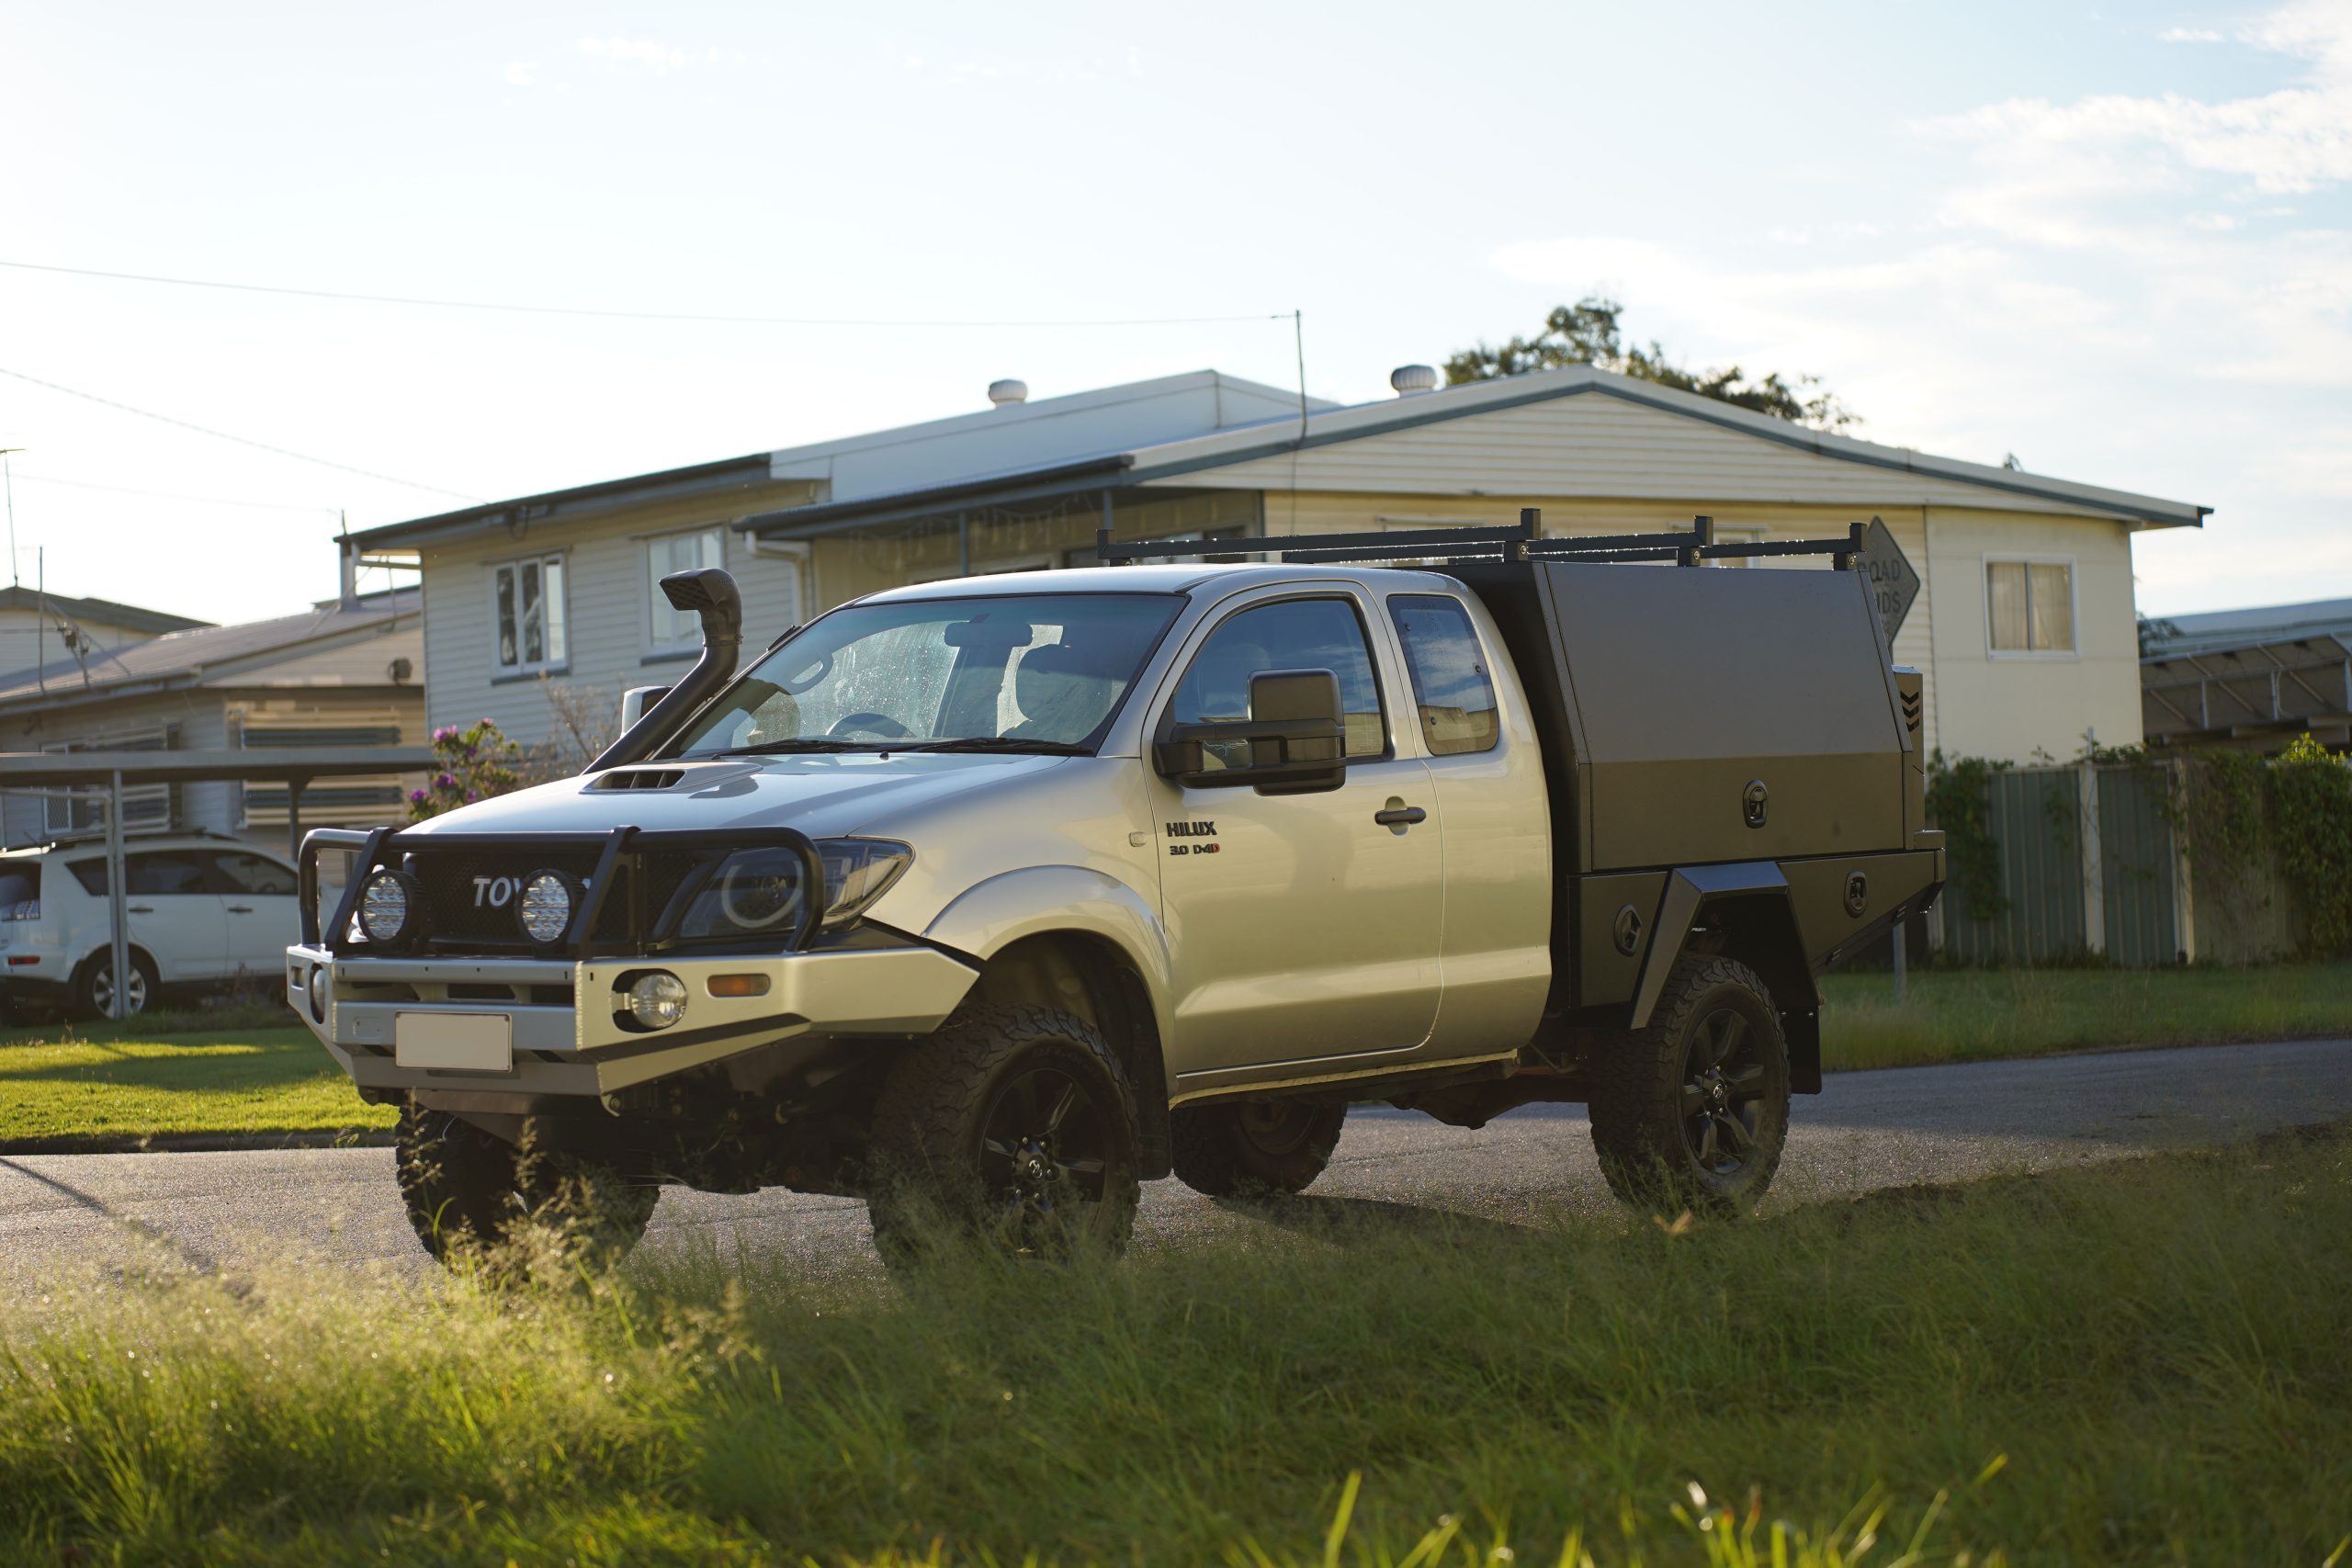
My Pointers on Picking One: When I look at a tray, I’m looking for a few key things. It needs to be tough as nails but lightweight, which is why a well-built aluminium ute tray is usually the best bang for your buck. Look for smart features like under-tray toolboxes for your recovery gear and options for a built-in water tank.
Step 2: Building Your Mobile Fortress – The Aluminium Ute Canopy
Its Real Value: A canopy is so much more than a lid. It’s your vault, your pantry, and your shelter from the storm. A solid, weatherproof ute canopy means that no matter what’s happening outside, your gear inside is safe, dry, and clean.
Lessons I’ve Learned: I learned this one the hard way with a cheap canopy years ago—it leaked like a sieve in the rain. Now, I only look for two things religiously: seals and locks. You want proper, thick, automotive-grade rubber seals, just like a car door. And you need decent compression locks that physically pull the door in tight. This stops water, dust, and stops the doors from rattling on rough tracks.
Step 3: The Guts of the Operation – Smart Storage & Power
A. Getting Your Gear Sorted (Smart Storage): My Experience: This is the game-changer that makes every trip easier. Installing a good set of heavy-duty drawer systems is a revelation. I have one for the kitchen gear and one for tools and spares. No more digging around. And a fridge slide? Mate, it’s a non-negotiable. Being able to slide your fridge out for easy access to a cold drink on a hot day is pure gold.
B. The Heartbeat of Your Rig (The 12V System): My Experience: If you want to run a fridge 24/7 without the fear of a flat starter battery, a second battery is a must. My advice is to do it once, do it right. Get a complete 12V system with a quality deep-cycle battery and a good DCDC charger to manage it all. If you can stretch the budget, putting a solar panel on the roof means you’re getting free power from the sun every time you stop. It’s the key to staying off-grid for longer.
Step 4: The Finishing Touches – Smart Accessories
My Experience: With your core system sorted, you can add the extras that suit your style of travel. These are often the ‘nice-to-haves’ that depend on your personal needs. For example, a roof rack is brilliant for bulky but lightweight gear like swags or a rooftop tent if you’re a serious camper. For those long, remote trips, a rear bar with a spare wheel and jerry can holder gives you massive peace of mind, but might be overkill for weekend trips closer to home.
My Go-To Blueprint: A Complete Build Breakdown
Theory is one thing, but seeing it in practice is what really counts. So, I’m going to share one of my own go-to build philosophies, breaking down how I configure a complete setup and the thinking behind it. Hopefully, this gives you a direct, real-world template to work from.
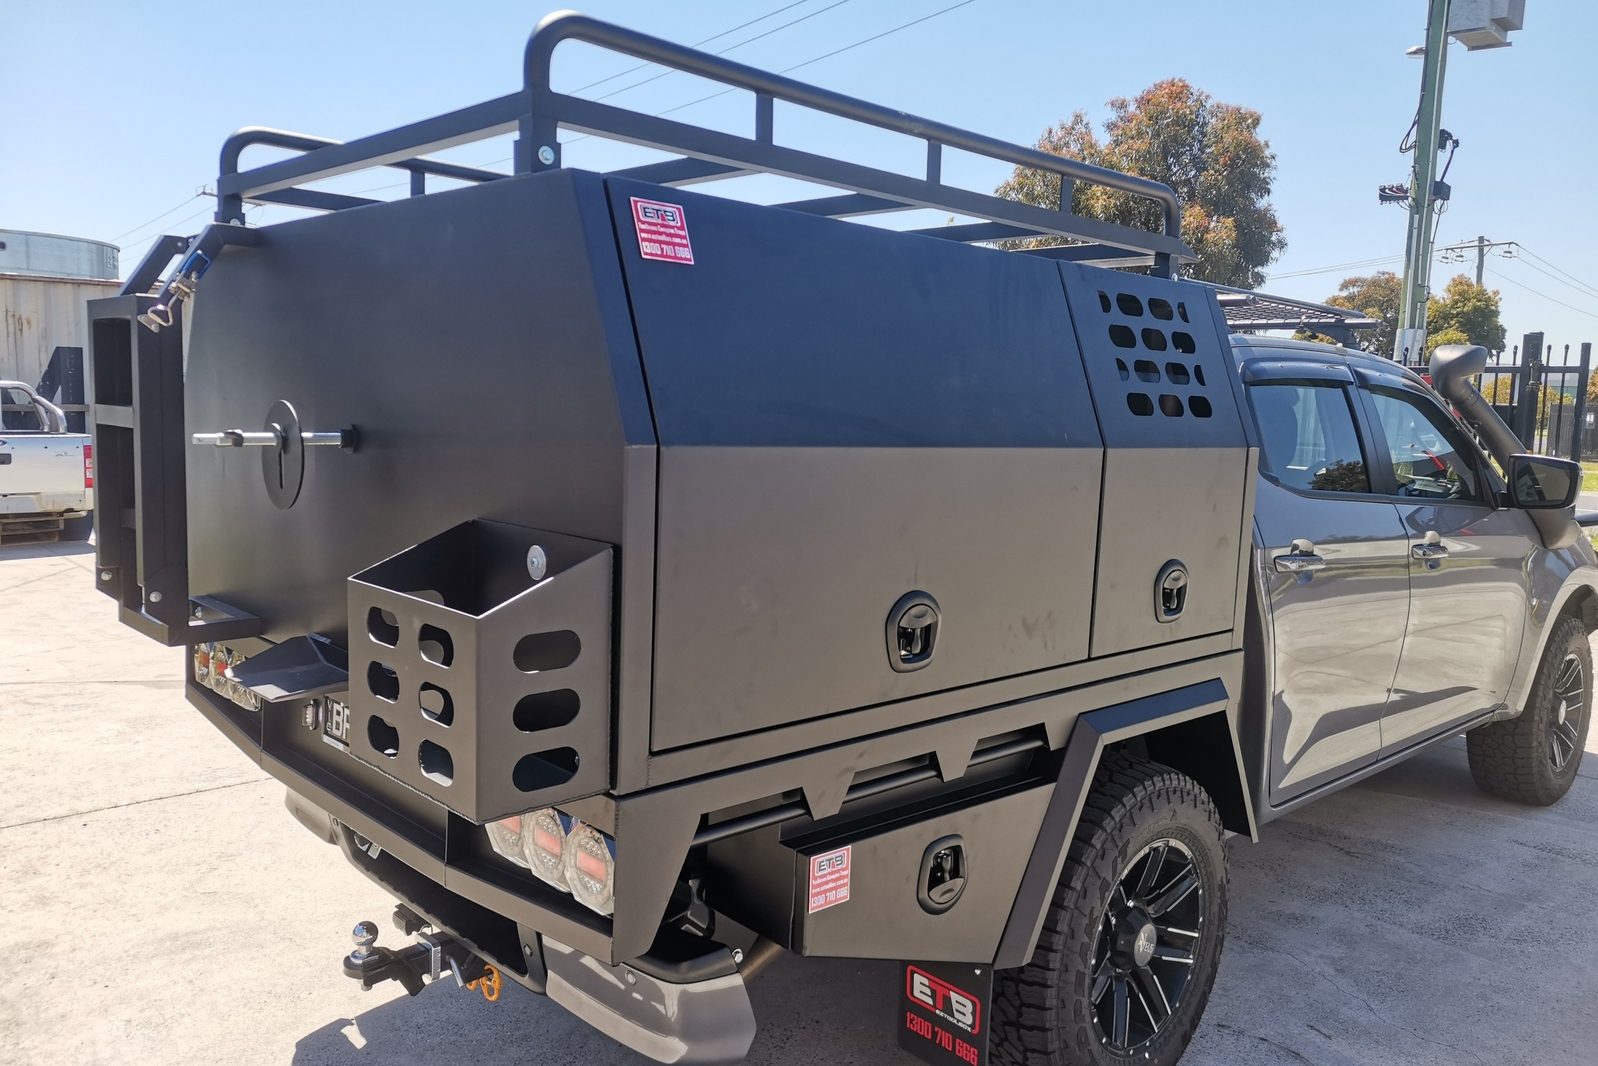
My personal setup is built for ultimate capability. I run an all-black canopy featuring a vented dog box section, which is a must-have for me. The full roof rack handles the swags and other bulky gear, while the back end is all business with a spare wheel carrier, a jerry can holder, and a ladder for quick roof access. Finally, the under-tray toolboxes are perfect for stashing recovery gear, keeping the main canopy space free. It’s a no-nonsense rig that’s ready for anything
The Final Word
At the end of the day, mate, there’s no single “perfect” build—only the perfect build for you. Hopefully, sharing a bit of my experience helps you dodge a few mistakes and plan your own ultimate rig. The goal is to build something that lets you forget about the gear and focus on the adventure ahead.
If you want to see how other folks have set up their rigs and get a few more ideas, have a squiz at our Customer Build Gallery. It’s full of great, real-world setups.
Cheers and stay safe out there.
Written by the team at Eztoolbox — a bunch of engineers and die-hard 4WDers who are just as passionate about exploring this incredible country as you are.


Leave a comment